
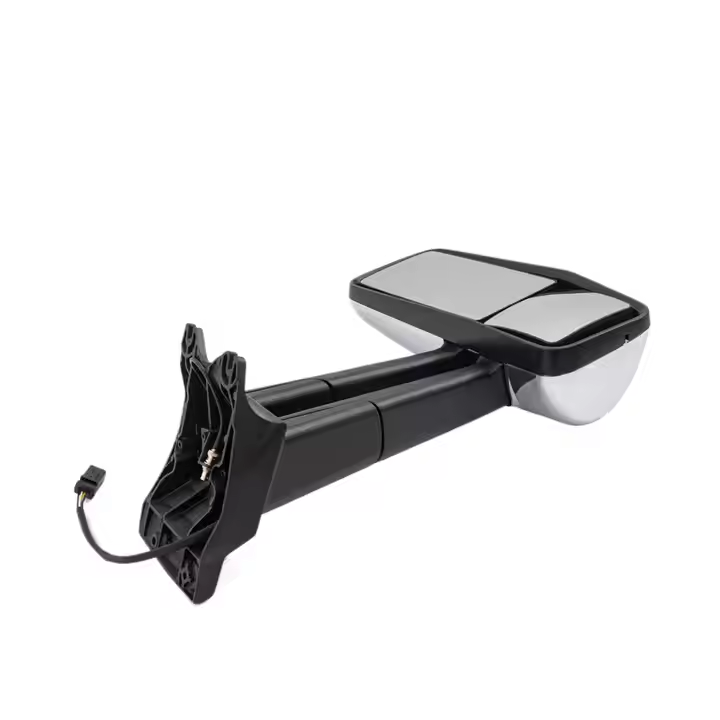
Are you a truck owner or a mechanic trying to figure out how to disassemble a Volvo truck mirror? Whether you’re replacing broken glass, fixing a loose mirror, or simply removing the back cover for maintenance, this guide will walk you through the process step-by-step. Disassembling truck mirrors might seem daunting, but with the right approach and tools, it’s a task you can handle on your own.
Understanding how to disassemble your truck’s mirror properly can save you time and money. In this article, we’ll cover everything you need to know about disassembling Volvo truck mirrors, including tips for removing the mirror back cover and reassembling it. With detailed instructions and practical insights, you’ll find the process more straightforward and less intimidating than you might expect.
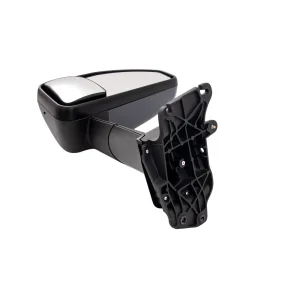
Why You Might Need to Disassemble a Volvo Truck Mirror
Before diving into the how-to, it’s essential to understand why you might need to disassemble a Volvo truck mirror. There are several common reasons, each requiring a slightly different approach:
Replacing Broken Mirror Glass
Over time, mirror glass can crack or shatter due to impacts or temperature changes. This is a common issue, particularly for those who drive frequently in challenging conditions. Replacing broken mirror glass is not only necessary for safety but also for maintaining the aesthetic appeal of your vehicle. When left unaddressed, shattered glass can lead to further issues, such as scratches on the mirror housing or even legal troubles, as it’s essential to keep your vehicle’s mirrors in proper working order.
Fixing Loose Mirrors
Mirrors can become loose, making it difficult to get a clear view of the road. A loose mirror not only compromises safety by providing a distorted view but also creates an annoying vibration noise while driving. Understanding the root cause of the looseness can help you fix the issue more effectively. It might be due to worn-out screws or a misaligned housing, both of which are fixable with some essential tools and a bit of patience.
Replacing or Repairing the Mirror Motor
Electric mirrors can experience motor failures or wiring issues. This can result in mirrors that won’t adjust, reducing your ability to see correctly. Identifying whether the problem is with the motor or the wiring is crucial, as each requires a different approach to fix. Sometimes, a simple reconnection or replacement of a wire can resolve the issue, while other times, the motor itself may need to be replaced.
Regular Maintenance and Cleaning
Removing the back cover can make it easier to clean and maintain the mirror. Dust and debris can accumulate behind the mirror, affecting its function and appearance. Regular maintenance not only extends the life of the mirror but also ensures optimal performance. By keeping your mirrors clean and well-maintained, you enhance the overall safety of your vehicle and provide a clear view at all times.
Tools You’ll Need
Before starting the disassembly process, gather the following tools. Having the right tools on hand will make the job easier and prevent unnecessary damage to the mirror components.
Basic Tools for Disassembly
- Flathead Screwdriver: Essential for prying and lifting components that are clipped in place.
- Phillips Screwdriver: Used for unscrewing the screws that hold the mirror assembly together.
- Trim Removal Tool: A specialized tool designed to remove trim without damaging the surface.
Safety Equipment
- Safety Gloves: Protect your hands from sharp edges and broken glass.
- Protective Eyewear: Shields your eyes from potential glass shards or debris.
Additional Tools
- Multimeter: Useful for checking electrical connections, primarily if the mirror is powered.
- Adhesive Remover: Helps in case the mirror glass is held with adhesive instead of clips.
Step-by-Step Guide to Disassemble a Volvo Truck Mirror
Step 1: Preparation
Preparation is key to a successful disassembly process. Ensure you have a clean and organized workspace to avoid losing small parts.
- Ensure Safety: Put on your safety gloves and protective eyewear to avoid injury from broken glass or sharp edges. Safety should always be your top priority.
- Park on a Level Surface: Make sure your truck is parked on a level surface with the parking brake engaged. This prevents any unwanted movement during the disassembly.
- Disconnect the Battery: If your mirror is electric, disconnect the truck’s battery to prevent any electrical accidents. This step is crucial to avoid short circuits or shocks.
Step 2: Removing the Mirror Back Cover
Removing the back cover is the first step in accessing the internal components of the mirror. Handle this part with care to avoid breaking the clips.
- Locate the Back Cover: The back cover is usually held in place by clips or screws. Identifying the type of fastening will determine the method of removal.
- Use a Trim Removal Tool: Insert the trim removal tool between the mirror housing and the back cover. This tool helps gently pry the cover without causing scratches.
- Gently Pry Off the Cover: Carefully pry the cover away from the mirror housing to avoid damaging the clips. If resistance is felt, check for any missed screws.
Step 3: Removing the Mirror Glass
Once the back cover is off, you can proceed to remove the mirror glass. This step requires precision to avoid breaking the glass further.
- Inspect the Mirror Glass: Determine if the glass is held by clips or adhesive. Knowing this helps you choose the proper removal technique.
- Use a Flathead Screwdriver: Insert the screwdriver between the mirror glass and the housing. Be gentle to prevent chipping the edges of the glass.
- Release the Clips or Adhesive: Gently twist the screwdriver to release the mirror glass. If adhesive is used, apply steady pressure until the glass comes free. Take your time to avoid cracking the glass.
Step 4: Detach the Mirror Assembly
With the glass removed, you can now detach the entire mirror assembly from the vehicle.
- Locate the Mounting Screws: Look for screws or bolts securing the mirror assembly to the truck. These are typically found behind the back cover.
- Use a Phillips Screwdriver: Unscrew the mounting hardware while supporting the mirror to prevent it from falling. Keep the screws in a safe place.
- Remove the Mirror Assembly: Carefully take the mirror assembly away from the truck. Handle it gently to avoid damaging the wiring if it’s an electric mirror.
Step 5: Reassembling the Mirror
Reassembly is the final step, where you’ll put everything back together. Ensure all parts are intact before proceeding.
- Replace Broken Parts: Install new mirror glass or replace any damaged components. This is your opportunity to upgrade or improve any worn-out parts.
- Reattach the Mirror Assembly: Align the mirror assembly with the mounting holes and secure it with screws or bolts. Ensure it’s tightly fastened to prevent any looseness.
- Reattach the Mirror Glass: Clip or adhere the new mirror glass into place. Make sure it’s securely fastened in order to prevent it from falling out while driving.
- Snap the Back Cover: Align the back cover with the housing and press firmly to snap it back into place. Double-check that all clips are engaged.
Tips for Successful Mirror Disassembly
Here are some additional tips to ensure a smooth disassembly process and prevent common mistakes.
Handle Glass with Care
Always handle mirror glass with care to prevent injury or further damage. Wear gloves and use tools that minimize direct contact with sharp edges.
Avoid Over-Tightening
When reattaching screws, avoid over-tightening, as this can crack the mirror housing. Use a balanced approach to ensure stability without causing damage.
Check for Electrical Connections
If your mirror is electric, ensure all connections are secure before reassembly. Loose wires can lead to functionality issues, so double-check each connection point.
Test the Mirror
Once reassembled, test the mirror to ensure it’s functioning correctly. Adjust it to see if the motor works and check for any vibrations or looseness.
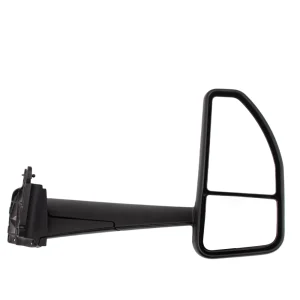
Troubleshooting Common Issues
Even with careful handling, you might encounter some issues. Here’s how to address them effectively.
Loose or Wobbly Mirror
If your mirror remains loose after reassembly, check for missing screws or damaged clips. Tighten any loose screws and replace broken clips as needed to restore stability.
Electric Mirror Malfunctions
If electric mirrors are not responding, inspect the wiring for any visible damage. Ensure that all electrical connections are secure, and test the mirror after reconnecting the battery. Sometimes, resetting the vehicle’s electrical system can resolve minor issues.
Difficulty Removing Back Cover
If the back cover is rugged to remove, apply gentle pressure and ensure you’re using the correct tools. Avoid forcing the cover, as this can damage the clips. Patience and the right angle often make the difference.
Conclusion
Disassembling a Volvo truck mirror is a task that can be accomplished with the right tools and a bit of patience. Whether you’re replacing mirror glass, fixing a loose mirror, or addressing electrical issues, following these steps can help you complete the task efficiently and safely. This guide provides the foundation you need to tackle mirror disassembly with confidence.
By understanding the process, you can maintain your truck’s mirrors in optimal condition, ensuring safe and clear visibility on the road. Regular maintenance not only extends the lifespan of your mirrors but also enhances your driving experience.
Remember, if you’re unsure about any step or encounter significant issues, it’s always best to consult a professional mechanic for assistance. Safe driving!

Reviews
There are no reviews yet.