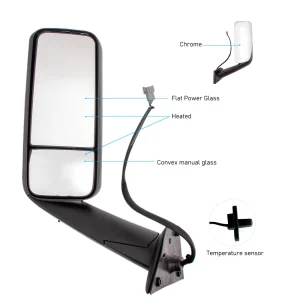
Replacing the right side mirror on your 1997 S10 truck might seem like a daunting task, but with the right tools and guidance, you can handle it yourself. Whether your mirror is cracked, broken, or just worn out, this guide will walk you through the replacement process step-by-step. By the end of this article, you’ll have the confidence to replace the mirror and get your truck looking and functioning at its best again.
Why Replace Your Truck’s Right Side Mirror?
Importance for Safety
A well-functioning side mirror is crucial for safe driving. It provides essential visibility of the lanes beside you, helping to prevent blind spot accidents. Without a properly working side mirror, changing lanes or merging into traffic becomes significantly more dangerous. Ensuring your mirrors are in top condition is a basic yet critical safety measure for all drivers.
Legal Implications
Driving with a damaged or missing mirror can lead to legal consequences. Many regions have laws requiring fully functional mirrors, and failure to comply can result in traffic fines or penalties. Keeping your mirrors intact not only helps you avoid these legal troubles but also demonstrates responsible vehicle maintenance.
Aesthetic Considerations
Beyond safety and legality, side mirrors contribute to the overall appearance of your vehicle. A cracked or missing mirror can make your truck look neglected or poorly maintained. Replacing the mirror restores your truck’s visual appeal, preserving its value and ensuring it looks as good as it drives.
Tools Needed for Replacement
Essential Tools
Before diving into the replacement process, gather the necessary tools. A new right side mirror specifically designed for a 1997 S10 truck is crucial. Ensure it’s the correct fit to avoid compatibility issues during installation.
Screwdrivers
Both Phillips and flathead screwdrivers are needed to handle various screws on the door panel and the mirror assembly. These tools are versatile and essential for removing and securing parts without causing damage.
Socket Wrench Set and Trim Removal Tool
A socket wrench set is required to deal with the bolts holding the mirror in place, allowing for efficient removal and attachment. Additionally, a trim removal tool helps safely detach the door panel without damaging the clips and surrounding components.
Protective Gear
Don’t overlook safety items such as masking tape, which protects the truck’s paint during the process. Having protective gloves can also prevent injuries from sharp edges, particularly when handling a broken mirror.
Step-by-Step Guide to Replacing the Right Side Mirror
Step 1: Purchase the Correct Mirror
Identifying the Right Model
First, ensure you have the correct replacement mirror. For a 1997 S10 truck, it’s important to get a mirror that fits the model precisely. Check the part number or consult with a professional to ensure compatibility.
Where to Buy
You can find these mirrors at auto parts stores, where staff can assist with selecting the right model. Alternatively, online retailers offer a wide range of options, often at competitive prices. Always verify that the mirror is specifically for the right side to avoid any installation issues.
Quality Considerations
When purchasing, consider the quality of the mirror. Opt for reputable brands or OEM parts that offer durability and reliability. A well-made mirror will withstand the elements and provide clear visibility for years to come.
Step 2: Prepare Your Workspace
Choosing the Right Location
Find a safe and flat area to park your truck. A level surface ensures stability and prevents the vehicle from shifting during the replacement process. An open, well-ventilated space with ample light is ideal for visibility and comfort.
Safety Precautions
Turn off the engine and ensure the parking brake is engaged. This will keep your truck stable while you work and prevent any accidental movements. Always prioritize safety to avoid injuries or damage to your vehicle.
Organizing Tools and Equipment
Before starting, organize all the tools and equipment you’ll need within easy reach. This preparation minimizes interruptions and streamlines the replacement process, allowing you to focus on the task at hand.
Step 3: Remove the Door Panel
Removing Screws
Start by locating and removing the screws on the door panel. These are typically found near the handle and along the bottom of the panel. Use the appropriate screwdriver to avoid stripping the screws, which can complicate reassembly.
Using a Trim Tool
Use a trim removal tool to gently pry off the door panel. Be careful to avoid damaging the clips that hold it in place. Work slowly and methodically, listening for any unusual sounds that might indicate a problem.
Disconnecting Wiring
If your mirror is powered, disconnect the wiring harness connected to the mirror controls. This step is crucial to prevent electrical issues or damage during the removal process. Labeling wires can help ensure correct reconnection later on.
Step 4: Remove the Old Mirror
Locating Bolts
Find the bolts holding the mirror in place. These are usually covered by a trim piece on the inside of the door. Carefully remove any covers to access the bolts without damaging the surrounding material.
Unscrewing Bolts
Use a socket wrench to remove these bolts. Hold the mirror with one hand to prevent it from falling as you remove the final bolt. This step requires precision to avoid dropping the mirror, which could cause further damage.
Safely Removing the Mirror
Carefully take off the old mirror. If it’s broken, be cautious of any sharp edges. Use gloves to protect your hands, and dispose of the broken mirror responsibly, adhering to local disposal regulations.
Step 5: Install the New Mirror
Positioning the New Mirror
Align the new mirror with the mounting holes. Take your time to ensure perfect alignment, which is crucial for a secure fit and proper functionality. Double-check the positioning before proceeding to the next step.
Securing with Bolts
Insert and tighten the bolts to secure the mirror in place. Ensure it’s firmly attached but avoid over-tightening, as this can crack the mirror housing. Use a torque wrench if possible to achieve the recommended tightness level.
Reconnecting Wiring
If applicable, reconnect the wiring harness. Ensure that all connections are secure to prevent electrical issues. Test the mirror’s electrical functions, such as adjustment and heating, to confirm proper installation.
Step 6: Reattach the Door Panel
Aligning and Pressing
Align the door panel with the door and press it back into place, ensuring the clips snap back in securely. Listen for clicks to confirm the panel is properly reattached. Misalignment can cause rattling or loose panels.
Replacing Screws
Reinsert and tighten the screws you removed earlier. Ensure each screw is aligned correctly to prevent cross-threading, which can damage the door panel. Tighten them evenly to maintain the panel’s integrity.
Testing the Mirror
Check that the mirror is secure and, if powered, that it adjusts correctly. Test all functions, including manual adjustments and electrical features, to ensure everything works as expected. This final check guarantees a successful installation.
Additional Tips and Safety Precautions
Use Masking Tape
Before starting, apply masking tape around the mirror area to protect the paint on your truck. This simple step can prevent scratches and maintain your vehicle’s aesthetic appeal. Remove the tape carefully after completing the installation.
Work in Good Light
Ensure you have plenty of light to see what you’re doing, especially when dealing with wiring and small screws. Good lighting reduces the risk of errors and helps you work more efficiently. Consider using a portable work light or headlamp if necessary.
Seek Help if Needed
If you’re unsure about any step, don’t hesitate to seek help from a professional or consult your truck’s manual. Having a second pair of hands or expert advice can make the process smoother and prevent costly mistakes. Always prioritize accuracy and safety over speed.
Conclusion
Replacing the right side mirror on a 1997 S10 truck is a task you can accomplish with a bit of patience and the right tools. By following this guide, you’ll ensure your truck is safe to drive, and you’ll save money by doing it yourself. With your new mirror in place, you’ll have better visibility and peace of mind knowing your truck is back in top shape.
Remember, regular maintenance and timely repairs are key to keeping your vehicle running smoothly. Whether it’s a mirror replacement or any other repair, taking the time to address issues promptly can prevent more significant problems down the road. Happy driving!