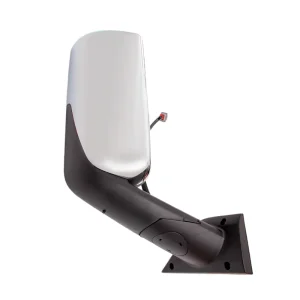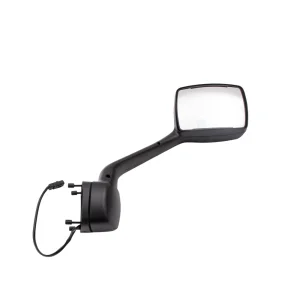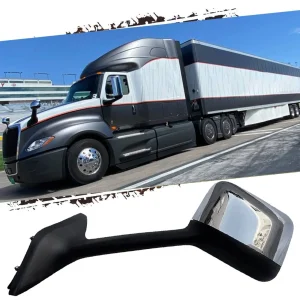
Replacing a mirror on your Chevrolet truck might seem like a daunting task, but with the right tools and guidance, you can accomplish it quickly. Whether you own a 1994 Chevrolet Truck 3500 or a 2012 Chevrolet Box Truck 4800, understanding the process of mirror replacement is essential. This guide will walk you through the steps for replacing various types of mirrors on Chevrolet trucks, including side mirrors, rearview mirrors, and mirror extensions.
Identifying the Type of Mirror
Before embarking on your mirror replacement journey, it’s crucial to identify the specific type of mirror you need to replace. Chevrolet trucks come with a variety of mirrors depending on the model and year, and recognizing these differences can save you time and effort.
Side Mirrors
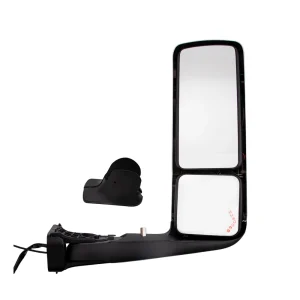
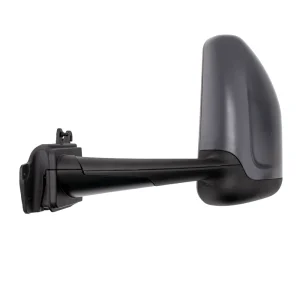
Side mirrors are positioned on the exterior sides of your truck and are integral to providing visibility of the adjacent lanes and rear traffic. These mirrors come in various designs, such as manual, power-operated, heated, and even built-in turn signals. Understanding the specific features of your side mirror is critical for purchasing the correct replacement.
Rearview Mirrors
Found inside the vehicle, rearview mirrors allow you to see what’s directly behind you. They can be simple manual mirrors or more advanced types that feature auto-dimming, compass, or even backup camera displays. Knowing the kind of rearview mirror you have will ensure you buy a compatible replacement that maintains the functionality you rely on.
Mirror Extensions
Mirror extensions are added to existing mirrors to provide a wider field of view, which is especially useful for towing. These can be clip-on or slide-on types and are designed to give you an extended view without needing to replace the entire mirror unit. Identifying whether your towing needs require such extensions can enhance your driving safety significantly.
Tools and Materials Needed
Having the right tools and materials on hand before starting your mirror replacement project is essential. This will not only make the process smoother but also prevent any damage to your vehicle.
Essential Tools
You’ll need some essential tools that are likely already in your toolbox. A set of screwdrivers, both flathead and Phillips, will help you tackle most screws you’ll encounter. Additionally, a wrench set is indispensable for dealing with bolts that secure the mirrors to the truck.
Replacement Mirror
Ensure that the replacement mirror is specific to your truck’s model and year. This will guarantee a perfect fit and maintain your vehicle’s aesthetic. Researching part numbers or consulting with a dealership can assist in acquiring the right mirror.
Additional Materials
Depending on the type of mirror, you might need adhesive or mounting hardware. Some mirrors, especially those with electronic features, require special adhesives to hold them securely in place. Safety gloves are also recommended to protect your hands from sharp edges and to provide a better grip on tools and materials.
Step-by-Step Guide to Replacing Side Mirrors
Replacing side mirrors involves several steps, each requiring attention to detail to ensure a successful outcome. Let’s delve into each phase of the process.
1. Removing the Old Mirror
Disconnect the Battery
Safety should always be your top priority. Disconnect the negative terminal of your truck’s battery to prevent any electrical issues. This step is crucial when working with power mirrors to avoid short circuits or accidental activation.
Remove the Interior Door Panel
Use a flathead screwdriver to pry off the door panel carefully. Look for hidden screws that might be securing the panel and remove them. Once the panel is loose, gently pull it away from the door to access the mirror mounting bolts. Taking care not to damage the panel will ensure it can be reattached securely later.
Detach the Old Mirror
Locate the mirror’s mounting bolts inside the door and use a wrench to unscrew them. If your mirror is electrically powered, disconnect the wiring harness before removing it completely. Handling the wiring with care will prevent damage to your truck’s electrical system.
2. Installing the New Mirror
Attach the New Mirror
Position the new mirror in place, aligning it with the mounting holes. Securely screw in the mounting bolts, making sure the mirror is firmly attached. Double-check the alignment to ensure it matches the original positioning.
Reconnect the Wiring (if applicable)
If the mirror is powered, connect the wiring harness to the new mirror. Test the mirror’s functionality before reattaching the door panel to ensure everything works correctly.
Reattach the Door Panel
Align the door panel with the door frame and snap it back into place. Replace any screws removed earlier to secure the panel. Ensuring a snug fit will prevent rattling noises while driving.
Replacing the Rearview Mirror
Rearview mirrors are crucial for safe driving, and replacing them involves a straightforward process.
1. Removing the Old Rearview Mirror
Loosen the Mounting Screw
Most rearview mirrors are attached with a small screw. Use a screwdriver to loosen this screw, taking care not to strip it. Maintaining the integrity of the screw will make reinstallation easier.
Slide the Mirror Off
Once the screw is loose, slide the mirror off the mounting bracket. Handle the mirror gently to avoid damaging the windshield or the bracket itself.
2. Installing the New Rearview Mirror
Position the New Mirror
Align the new mirror with the mounting bracket. Ensuring proper alignment will facilitate a secure installation and optimal visibility.
Tighten the Mounting Screw
Secure the mirror by tightening the screw. Check the mirror’s stability and adjust its position for the best view. A firmly attached mirror will prevent vibrations and maintain clarity while driving.
Installing Mirror Extensions
Mirror extensions are an excellent addition for those who require a wider field of view, especially when towing.
1. Choosing the Right Extension
Compatibility Check
Ensure the extension is compatible with your GMC or Chevrolet truck model. Popular options include the GM Truck Mirror Extensions or Clear View Mirror Extensions. Verifying compatibility will prevent issues with fitment and functionality.
Considering Features
Some extensions offer additional features, such as anti-glare or heating. Assess your specific needs to choose an extension that enhances your driving experience.
Reviewing Manufacturer Guidelines
Consult the manufacturer’s guidelines to understand the installation process and any specific requirements. This will ensure you follow the recommended steps for optimal performance.
2. Attaching the Extensions
Prepare the Mirror
Clean the existing mirror to ensure the extension attaches securely. Removing dirt and debris will improve the bond between the mirror and the extension.
Install the Extension
Slide or clip the extension onto the existing mirror. Follow the manufacturer’s instructions for securing the extension. Ensuring a snug fit will prevent the extension from moving or detaching during use.
Test the Setup
After installation, test the mirror extension to ensure it provides the desired field of view. Making necessary adjustments will optimize visibility for safer towing.
Tips for Maintaining Your Truck Mirrors
Proper maintenance of your truck mirrors will extend their lifespan and enhance your driving safety.
Regular Cleaning
Keep mirrors clean for optimal visibility. Dirt and grime can obscure your view, so regular cleaning is essential. Use a gentle glass cleaner to maintain clarity without damaging the mirror surface.
Check for Secure Fit
Periodically check that all screws and attachments are tight. Vibrations from driving can loosen screws over time, so routine checks are essential to maintain mirror stability.
Inspect for Damage
Regularly inspect mirrors for cracks or damage and replace them as needed. Damaged mirrors can impair visibility and compromise safety, so addressing issues promptly is crucial.
Conclusion
Replacing a mirror on your Chevrolet or GMC truck is straightforward and can save you money and time. Whether you’re replacing a broken mirror or simply upgrading to mirror extensions for better visibility, following these steps will help ensure a successful installation.
By understanding the type of mirror you need and following the outlined steps, you can maintain your truck’s safety and functionality. Always remember to prioritize safety by disconnecting the battery before starting your work and using the proper tools.
With this guide, you are now equipped to handle your Chevrolet truck mirror replacement with confidence. Safe driving!