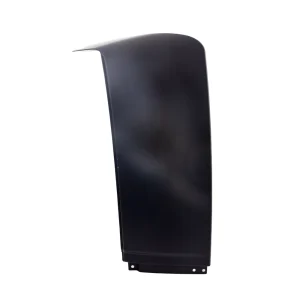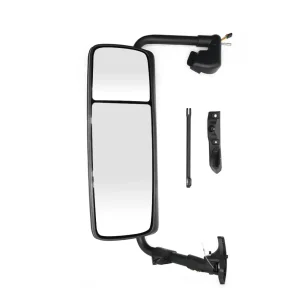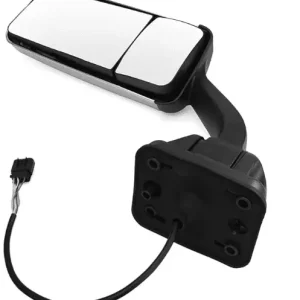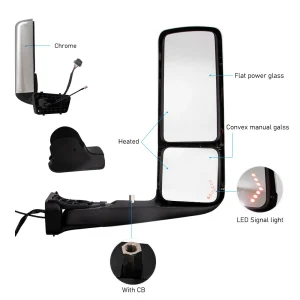
Before diving into the replacement process, it’s crucial to familiarize yourself with the different parts of the GMC truck mirror. Knowing what each part does will assist you during the installation process.

Mirror Glass
The mirror glass is the reflective part you look into. It’s essential for providing visibility to the driver, allowing them to see other vehicles and obstacles on the road. When replacing, ensure the new mirror glass is free from scratches and blemishes to maintain clear visibility.
Mirror Housing
The mirror housing is the exterior casing that holds the mirror glass. This component protects the mirror glass from external damage and weather conditions. When selecting a replacement, consider a housing that matches your truck’s color and finish for a seamless look.
Mirror Base
The mirror base is the part that attaches the mirror to the door. It provides stability and support, ensuring the mirror stays firmly in place. During installation, make sure the base is aligned correctly with the mounting points on the door to prevent any wobbling or detachment.
Mirror Motor
The mirror motor is a critical component in power mirrors. It allows for the adjustment of the mirror glass, enhancing driving safety and comfort. Enabling drivers to adjust the mirror position easily enhances driving safety and comfort. When installing a new mirror, ensure the motor is functioning correctly, especially if you opt for a power mirror replacement.
Tools Required for GMC Truck Side Mirror Replacement
To replace the side mirror on your GMC truck, you will need a few essential tools. Having these ready will make the process smoother and quicker.
Screwdrivers (Phillips and Flathead)
Screwdrivers are essential for removing screws from the door panel and mirror assembly. A Phillips screwdriver is typically used for cross-head screws, while a flathead screwdriver can be helpful for prying and removing flat screws.
Socket Wrench Set
A socket wrench set is necessary for loosening and tightening the bolts that secure the mirror to the door. Choose a set with various socket sizes to fit different bolt heads, ensuring you have the right tool for the job.
Trim Removal Tool
A trim removal tool helps to carefully remove trim pieces around the door panel without causing damage. This tool is handy for accessing hidden screws and clips, ensuring the trim pieces remain intact during the process.
Replacement Mirror
The centerpiece of this task is a replacement mirror. Consider whether you want an OEM (Original Equipment Manufacturer) or an aftermarket mirror, each offering different benefits in terms of quality, cost, and features.
Safety Gloves
Safety gloves protect your hands from sharp edges and provide a better grip during the installation process. They are instrumental when handling glass components, reducing the risk of injury.
How to Replace the Driver’s Side Mirror on a GMC Truck
Follow these steps for a successful GMC truck mirror replacement. This guide will focus on a general process applicable to most models, including the 1500 and C2500 series.
Step 1: Remove the Door Panel
First, you need to remove the door panel to access the mirror’s mounting screws.
- Disconnect the Battery: Safety first! Disconnect the battery to avoid any electrical issues. This step prevents accidental short circuits when dealing with power mirrors.
- Remove Trim Pieces: Use a trim removal tool to remove any trim pieces around the door panel carefully. Gently prying the trim prevents breakage and maintains the aesthetic of your truck.
- Unscrew the Door Panel: Locate and remove screws that hold the door panel in place. Typically, these are found near the armrest and door handle. Keep the screws in a safe place for reinstallation.
- Disconnect Wiring: If your truck has power mirrors, disconnect the wiring harness before obliterating the panel. This step ensures you don’t damage the wiring during panel removal.
Step 2: Remove the Old Mirror
With the door panel removed, you can now access the mirror assembly.
- Locate the Mirror Bolts: Find the bolts that secure the mirror to the door. These are usually located behind the black plastic cover inside the door. Identifying the correct bolts is crucial for a smooth removal process.
- Remove the Bolts: Use a socket wrench to unscrew the bolts. Be sure to hold the mirror to prevent it from falling once the bolts are removed. Carefully lowering the mirror avoids scratching the door’s paint.
- Detach the Mirror: Carefully pull the mirror away from the door, disconnecting any remaining wiring if necessary. Ensure all connections are fully disengaged to prevent damaging the new mirror’s installation process.
Step 3: Install the New Mirror
Now, it’s time to install the replacement mirror. Depending on your preference and budget, you can choose between OEM parts or aftermarket options.
- Align the New Mirror: Position the new mirror on the door, aligning it with the mounting holes. Proper alignment ensures the mirror sits flush against the door, reducing wind noise.
- Secure the Mirror: Insert and tighten the bolts to secure the mirror to the door. Ensure it is firmly in place. Double-check that all screws are tightened evenly to prevent wobbling.
- Reconnect Wiring: Reconnect any wiring for power mirrors, ensuring all connections are secure. Test the mirror’s movement functions to confirm correct installation and operation.
Step 4: Reattach the Door Panel
With the new mirror installed, you can now reattach the door panel.
- Reconnect Wiring Harness: If applicable, reconnect the wiring harness for the door controls. Ensure all connections are secure and functioning before sealing the panel.
- Align the Door Panel: Line up the door panel with the clips and press it back into place. Proper alignment will prevent rattling noises and maintain the door’s structural integrity.
- Replace Screws and Trim: Reinsert the screws and replace any trim pieces removed earlier. Make sure everything fits snugly and appears as it did before starting the replacement.
Tips for Choosing the Right Replacement Mirror
When selecting a replacement mirror for your GMC truck, consider these factors:
Compatibility
Ensure the mirror is compatible with your specific GMC model and year. Check the mirror’s specifications and your vehicle’s manual to avoid purchasing an incompatible part.
Features
Decide if you need features like heating or power adjustment. Heated mirrors are functional in colder climates to prevent fogging, while power-adjustable mirrors offer convenience and enhanced safety.
Quality
You can choose between OEM and aftermarket mirrors based on quality and budget. OEM mirrors typically ensure a perfect fit and finish, while aftermarket mirrors may offer more variety at a lower price.
Finish
Consider the finish of the mirror housing to match your truck’s aesthetics. A matching finish maintains your truck’s visual appeal and can increase its resale value.
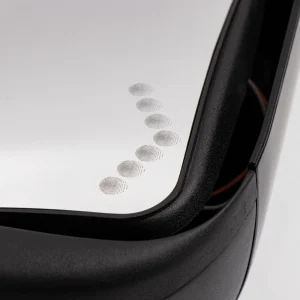
Aftermarket GMC Truck Mirror Puller
For those who prefer aftermarket options, a GMC truck mirror puller can be an excellent investment. These tools simplify the removal and installation of mirrors, ensuring a secure fit and reducing the risk of damage.
Advantages of Using a Mirror Puller
A mirror puller tool is specifically designed to handle the delicate task of removing and installing mirrors without causing damage. This tool provides leverage and precision, ensuring the mirror is handled with care.
Cost-Effectiveness
Investing in a mirror puller can save you money in the long run. By reducing the risk of damaging your truck or the mirror during installation, you avoid the costs associated with repairs or replacements.
Ease of Use
Mirror pullers are generally easy to use, even for those with minimal mechanical experience. They offer a straightforward solution for those who prefer to handle car repairs themselves.
Conclusion
With the right tools and steps, replacing a side mirror on your GMC truck is manageable. By understanding the parts, preparing your tools, and following a methodical approach, you can complete a GMC truck mirror replacement. Whether you’re replacing a mirror on a 1997 GMCC250 or a newer model, this guide should help you restore your truck’s functionality and appearance.
Consulting a Professional
Remember, if you ever feel unsure about the process, consulting a professional mechanic is always a wise choice. They can provide expert advice and ensure the replacement is performed correctly.
Final Checks
After installation, take a moment to check the mirror’s stability and functionality. Ensure that all screws are tight and that the mirror adjusts smoothly.
Safe Driving
Once everything is in place, enjoy the safety and enhanced visibility your new mirror provides. Happy driving!